New for 2026
A whole generation of bass music was defined by the mighty scream filter. This aggressive, vowel-like resonant filter was once locked inside a heavy synth and was the crown jewel of Native Instruments’ Massive. A synth, that owns a corner of my heart.
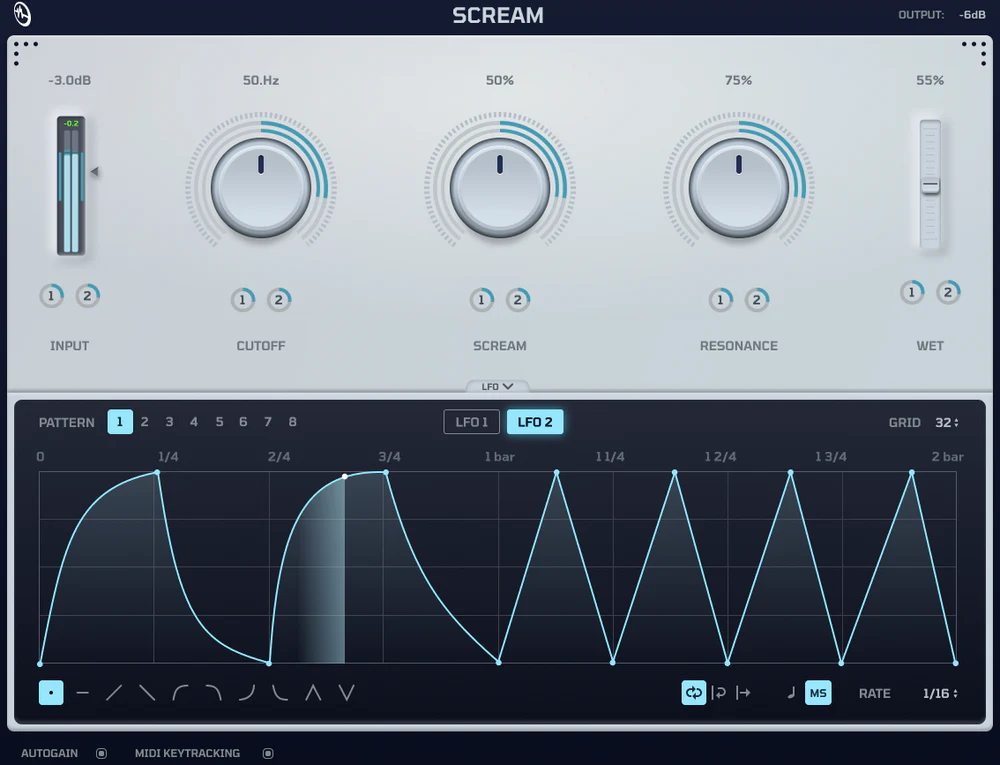
That is altered by the cure audio scream. It is a free, open-source, stand-alone scream VST that uses contemporary performance standards to infuse any sound source in your DAW with that iconic 2010-era grit.
This recreation provides the precise non-linear resonance and “shouting” distortion that producers have been missing for years if you’re searching for a dependable scream plugin.
While other filters exist, the scream vst by cure audio is the only version dedicated to capturing the specific saturation curves of the original.
| Feature | Cure Audio Scream | Original Massive Filter |
| Availability | Standalone Scream VST | Internal Synth Module only |
| Performance | Optimized 58μs CPU Frame Time | High CPU Overhead |
| Modulation | 8 Custom Drawable Patterns | Limited Step Sequencing |
| Format | VST3, AUv2, & CLAP | Proprietary |
| Source | Open Source / Community Driven | Closed Source |
You know me, im very specific, here are a few genres you can use the scream filter by Cure Audio on:
It is 100% Free and Open Source (GPL-3.0 license). There are no "lite" version restrictions, no hidden subscriptions, and no ilok. Cure Audio makes their money selling the "Scream Sample Pack" and preset bundles, but the scream plugin itself is fully functional and yours to keep forever.
Yes. Unlike older legacy plugins that require Rosetta 2, scream vst cure audio is compiled natively for Apple Silicon. This means lower latency and zero CPU translation overhead when running in Logic Pro, Ableton, or Bitwig on modern Macs.
Most DAW filters (like Ableton’s Auto Filter) are designed to be transparent. The massive scream filter is a "character" effect. It uses a specific non-linear feedback loop that distorts the resonance as you push it. If you want a filter that "shouts" and adds harmonics rather than just cutting them, this is the specific tool for that job.
As an open-source project, you can find the repository on GitHub. This allows developers to audit the code, fix bugs, or even fork the project to create custom versions of the scream vst.